- To access the Sector Assessment forms, tap the “Sector Assessment” button on the home screen.
- To start a new Sector Assessment form, tap the “New Form” button on the Sector Assessment home screen (figure 20). This will start a fresh Sector Assessment form (figure 21).
- To save and close a Sector form, tap “Home” or “Close”. If the minimum mandatory information for the form has not been entered, the fields will highlight in red. If “Close” is tapped, the form is closed, and the user is returned back to the list of saved Sector forms (figure 20). If “Home” is tapped, the user returns back to the app home screen, and upon tapping “Sector Assessment” again, is returned back to the last opened Sector form (figure 21).
- To upload Sector Assessment forms to the server (for Team Admins and Ops Coordinators), check the checkbox with a green checkmark for the items you wish to upload and tap “Upload” (figure 20).
- To delete an existing Sector form, tap the trash can icon next to the Sector form (figure 20).
- To add photos to a Sector form, from the Sector form screen, tap “Camera” to take a photo and associate to the form (figure 22). If a photo has been saved for a Sector form, a small preview of the photo is displayed on the list of saved Sector forms on the device (figure 20). To enlarged a saved sector form, tap the photo thumbnail in the photo gallery for the Sector form, and tap again to close.
- To delete a photo, tap the trash can icon for the photo in the “Photos” screen for that Sector form (figure 20).
- To share a Sector form to another user via a web link (URL), tap the “Share” menu option on the Sector form, then select your desired method to share the form (similar to figure 23). If the recipient opens the link without the app installed on their device, the link will open an INSARG pdf form with the Sector Form, list of any associated Worksites/Waypoints and any saved photos.
- To view the pdf INSARAG guidelines for Sector forms, tap the “Guidance” menu link in the Sector Form screen (similar to figure 11).
- To associate saved Worksites and Waypoints to the Sector form, tap the “Worksites” menu link on the Sector form screen (figure 21). This will open a list of all associated Worksites and Waypoints to this Sector form (figure 24).
- To add a Worksite to the Sector form, tap the “Add Worksite” button on the Sector Worksites/Waypoints list screen (figure 24). This will open a list of all unassigned Worksites in your device that can be associated to the current Sector form (figure 25). Simply check the checkbox to show a green checkmark, then tap “Back”. Your selected Worksites will now appear on figure 24 and will no longer display on figure 25.
- To unassociated a Worksite from a Sector form, tap the minus button on figure 24. This will release the Worksite back to the available list of Worksites to add to Sector forms (figure 25).
- To add a Waypoint to the Sector form, tap the “Add Waypoint” button from figure 24. This will open a list of all available saved Waypoints on the device to add to your Sector form. Simply check the checkbox to show the green checkmark and tap “Back”. Your chosen Waypoints will now appear in the list of associated Worksites/Waypoints in figure 24.
- To remove a Waypoint from a Sector form, simply tap the minus button next to the Waypoint in figure 24. As a note, any Waypoint that is associated to a Sector form will not be available for delete from the saved Waypoints list screen in the GPS section of the app until the Waypoint is released from the Sector form or the Sector form with the Waypoint associated to it is deleted from your device.
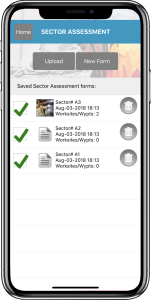 Figure 20. Sector forms home |
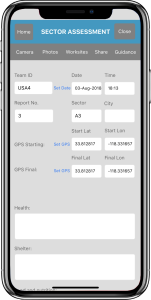 Figure 21. Sector form |
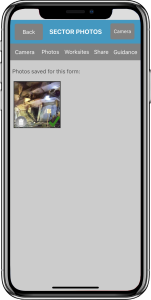 Figure 22. Sector form photos |
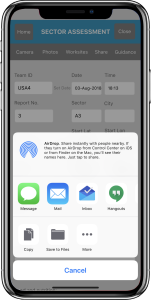 Figure 23. Share Sector form |
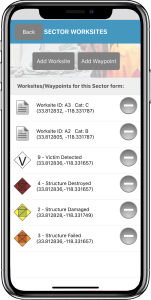 Figure 24. Sector attachment list |
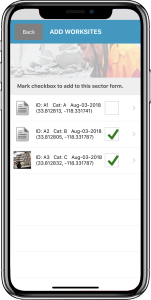 Figure 25. Select worksites list |
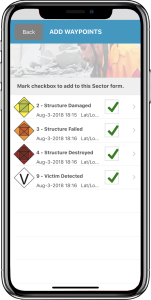 Figure 26. Waypoints select list |