- To view uploaded Triage forms by team members, click “Triage” in the main menu in the website (figure 52). The Triage forms listed are for those team members that have been checked to display in the “Accounts” section of the website. A list of which team member data is currently on display is listed at the top of each form page (figure 51). For Ops Coordinators, a “view only” version of external team code members shared to your team can also be seen here, if selected for view. Standard users will only see their own data on all sections of the website.
- To see the location of Triage forms on a map, check the checkboxes next to the desired Triage forms on the left most column, then click the “map” button above it (figure 53).
- To delete Triage forms, check the checkboxes and click the “Del” button on the bottom of the list. Clicking on “Delete” link for a Triage form deletes that form only as well.
- To edit a Triage form, click on “Edit” for a Triage form (figure 53).
- To view a populated pdf form of a Triage form, click the “View” link or the pdf icon for a Triage form (figure 54).
- To mark “Completed” status for Triage forms, check the checkboxes in the “Completed” column and click the “Update” button at the bottom right of the screen.
- To add notes to any Triage form, add content in the “Notes” boxes to the right of the Triage form and click “Update” at the bottom right of the screen. This same box also appears at the top of the Edit screen in figure 53.
- To download the Triage form data as an Excel file, click “Export Excel” in the upper right of the screen (figure 55).
- To download a KML file for the Triage forms, check the checkboxes for the desired Triage forms in the first column, then click the “download KML” link on the upper right of the screen.
- To download a GPX file for the Triage forms, check the checkboxes for the desired Triage forms in the first column, then click the “download GPX” link on the upper right of the screen.
- To sort the Triage form display, select sort by “Latest updates first”, “Worksite ID”, or “Save by name” in the drop down at the top left of the screen.
- To add a new Triage form on the website, click the “Add New Triage Form” link on the upper left of the screen.
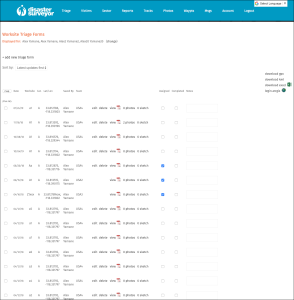 Figure 52. Triage form home |
|
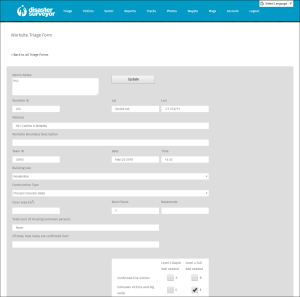 Figure 53. Edit Triage form |
|
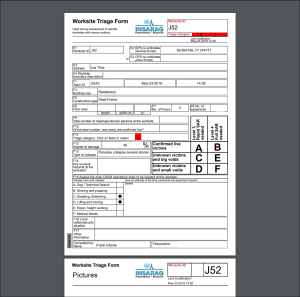 Figure 54. Triage form pdf |
|
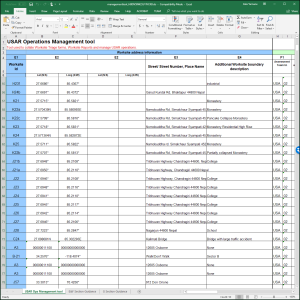 Figure 55. Excel download |